

Skill level: Moderate
Time estimation: ~1.0 - 1.5 hours
Updated supply list
I found I didn't need certain items or the ways they bound certain pieces didn't hold as well. Here is a better list detailing what's needed:
- Old box of lightweight cardboard. Preferably one without a lot of folds. Folds will weaken the board and leave bumps on your hat. A good example would be a large cereal box, but the ideal would be something like a poster board.
- Fusible interfacing Medium-weight would be best probably. I used a light-weight interfacing, though
- Non-fusible interfacing ~Optional~ For more advance sewers and crafters who do not want to spend extra money on the more expensive fusible.
- Fabric about 1/4 yard to 1/2 yard, depending on how large you plan on making your hat. Half a yard will be for quite large hats. Now would be a great time to use up those scrap pieces! I used a piece of stretch, panne velvet fabric. This allowed me to compensate for mistakes while experimenting with patterns and prevented the fabric from fraying on the edges.
- Pins
- Needle and thread Thread should match the fabric.
- Wire or Floral wire Thicker wire should be used if you want to really alter your hat's brim shape. Floral wire will help keep the shape of the brim but will give you only a little bit of molding power.
- Hot glue gun
- Clothes iron
- Sewing machine
- Marker
- Tailor's tape
- Scissors
- Rotary blade ~Optional~

Updated Instructions with Pictures
I don't want to copyright infringe anything here, so these are my tips and advice on how to make this hat an alternative way. I will also give you instructions on how to alter the patterns so you can change the shape and look of your hat. Please, please, please go and sign up on Better Homes and Gardens to see how they do their project first. This will make it much easier to understand why I'm doing things this way.
1) Making the band pattern--- Make your patterns from the ones the website gives you. They say to blow up the pieces 400%. You can do this on your own, but if you are worried about the curved edges, you can easily print them out as guidelines. How neat your curves are really doesn't matter because you can always go back later and straighten them out in step 9. I drew my band pattern directly onto the cardboard with a marker to save time. You can do this, too, because no one will see the cardboard in the end product.
Altering the band pattern:
Let's say you don't like the patterns they gave you. Well, that's a really easy fix.

Here is the basic pattern. I've labeled some areas of the pattern to show what that section will become once completed. The height is colored in purple. The crown/top is the largest curve in this picture, and the curve that will belong to the bottom of the band is the other curve. Whatever you may do to the pattern, the height (in purple) must be the same length! This pattern calls for about 7'', feel free to make it taller if you like.


A rectangle will make a perfect cylinder for your hat. This is good for top hats.


By making almost a semi-circle, you will get a large flair with your hat. This will be very top heavy and very narrow on the bottom. This is good if you're going for a very cartoony look to your hat.
2) Cut out band pattern--- Using your newly created pattern or the pattern supplied on the Better Homes and Gardens website, cut out one band pattern from the lightweight cardboard.
3) Altering the crown and brim patterns--- Using a flexible ruler such as a tailor's tape, do your best to measure the crown's curved line (the largest curve). How long it is will be the circumference of your crown pattern. Instead of struggling with the tape and getting sloppy lines to make the circle pattern for your crown piece, just take the number you measured and divide it by π. Take this number and add one inch. This will be the diameter of the crown.
You do not have to have cardboard pieces for these patterns. You can use tissue paper, newspaper (iron newspaper first to avoid ink from spreading to your fabric and to straighten out crinkles. Butlers used a similar technique for their masters back in the day), or regular printing paper....whatever works. I used cardboard and butcher paper.
Do the same thing for the brim's section of the band pattern. Only in addition to the diameter you've calculated, add 2x the width you wish for your brim. For example, your diameter is 8'' and you want your brim to be 4''. You would add an additional 8'' to the 8'' diameter to compensate.
Now you have all your pattern pieces and are set for the rest of the project!


6) Iron fusible interfacing to fabric piece--- Iron the interfacing to the WRONG side of the fabric. Beginners, place the side of the interfacing with all the bumps closest to the fabric.
.
7) Clip the edges of the circle--- Going about 0.5'' deep, snip around the circle. Clipping will eliminate bulk when we press this on our cone in step 10.
 |
| It helps to use a ruler and marker to mark the notches so you don't go too deep |
9) Wrap the band into a cylinder--- Curl the cardboard around. Line up the purple, height lines as best as you can. Take the hot glue gun and run a stream of glue along the edge of one side. Press the other side to the glue. How much you overlap doesn't matter, but try to keep it under one inch on each side.

10) Glue cylinder top to crown--- Lay the crown piece bottom-side up/interfacing up. Take your band. Along the side for the crown, run hot glue around the circumference. Quickly press this into the center of the crown piece.


 |
| The glue will be hot. Use maker to press fabric to cardboard. |
12) Make the brim--- Grab your pattern for the brim piece. Cut out two fabric pieces and two interfacing pieces. If you are new to interfacing, opt for the fusible again. If you feel you're a decent sewer, stick with the non-fusible to save it for other projects. If you use fusible, remember to iron interfacing to both pieces of fabric before continuing.


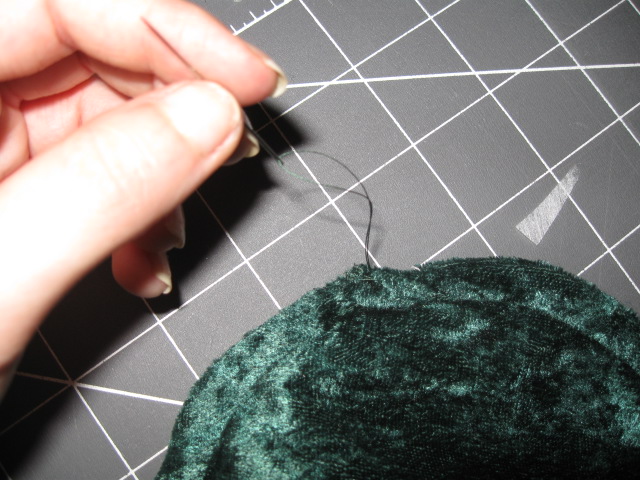
14) Making casing for wire--- Turn the brim right-side out. Sew using a matching thread a casing. Sew about 3/8'' away from the edge. Complete the entire circle.


15) Wire--- Loop the end of the wire as pictured below if possible. This will keep it from catching. Feed it into the casing you just made. Cut off the end once finished. End the wire by twisting it into the beginning of the wire, or loop it again. I am using floral wire because that's all I have at the moment.


Changes: I made several changes from the original. For starters, I swapped the glues, interfacing, and also altered the pattern slightly. I also changed the order around because when I followed their guidelines, I found some ways they could have been edited to make it simpler. Thanks again! Make sure to check out the original site at Better Homes and Gardens.

No comments:
Post a Comment