Showing posts with label party. Show all posts
Thursday, July 26, 2012
Lion Tamer Costume Finished!
There she is! Took me long enough, but I'm done!. This outfit will be worn with boats, black pants, my black leotard, and this. It's hard to see, but the black part of the jacket has roses on it to add a touch of texture. The vest is tea-stained to match the fabric I used for the ruffles. Overall, this costume cost me about $28 to make. Could be more, could be less because I was disorganized with my receipts *-.-*
I had pictures of the progress I made, but the files on my memory card are corrupt. I have no idea how to recover them, but luckily, the final result pictures made it.
The pattern I used was not my own, but Simplicity's 2525:
With some minor alterations, I was able to complete this jacket. The main difference is the volume around the arm holes. I took most of the poof out to give the jacket a more masculine appearance and to accommodate for the epaulettes.
I would be careful using canvas for the interfacing. I used more of a duck cloth to provide the interfacing, and it can be quite tight in the elbows. Otherwise, it is fine in the shell, and necessary for the collar.
The armholes are also to small for a girl with arms as big as mine. I made the armholes slightly bigger. I wish I had added more fabric at the end of the sleeves, but it'll do.
The fabrics I used are:
Broadcloth - red
Broadcloth - interfacing
Jacquard - black
Broadcloth - tea-stained white
??? - ruffles (I used someone's old scrap from a garage sale, feels silky)
Saturday, June 23, 2012
I'm Not Dead
Wow, how long has it been?! I've been incredibly busy. Not only did I have an insane workload last semester, I'm now in summer school. Still, I'm planning well in advance for my Halloween party! My fall semester is going to be crazier than the last (Physical chemistry, chemical analysis, biophysics, and all their labs. Yikes! I would say pray for me but I'm an aspiring scientist ;P )
I already have this year's theme ready and it's....
EVIL CARNIVAL!!
Yeah, that's right! Evil clowns, hall of mirrors, cotton candy.... that's the plan. I've already been garage saling for some items and have started on my costume. My eyelids can barely stay open right now, so I'll leave it at that. Just expect a couple of updates about the costume I'm making and the awesome garage sale items I've found, plus I'm going to be posting about music, decorations, crafts, and other carnival party goodies.
I already have this year's theme ready and it's....
EVIL CARNIVAL!!
Yeah, that's right! Evil clowns, hall of mirrors, cotton candy.... that's the plan. I've already been garage saling for some items and have started on my costume. My eyelids can barely stay open right now, so I'll leave it at that. Just expect a couple of updates about the costume I'm making and the awesome garage sale items I've found, plus I'm going to be posting about music, decorations, crafts, and other carnival party goodies.
Monday, November 28, 2011
Alice in Wonderland Halloween Party! Results
Wow, it's taken me this long to finally post the results of my efforts! I ended up being under budget. Hurray! And kept the entire party under $100. This was mostly due to my secret shopping and home-crafting of many of the decorations. Food ended up costing me a pretty penny and was a majority of the expenses, as I predicted. Anyway, everyone had fun! Here are some pictures of the decorations!
And that was that! Everyone had a blast and it was a lot of fun to make. Hope I've given everyone some ideas for their own Alice party!
Makin' the red velvet cupcakes! They were divine.
This is my costume, fully completed. Looks pretty good, right? You can also see some of the kitchen decorations in the background. Every room had a theme, and this one's was the Red Queen's Castle. So there were card houses, card suits, hearts, and lots of red!
I made the popcorn bags out of red paper bags and cut the tops off in jags. I then carved a stamp out of a potato in the shape of skulls and hearts. On the kitchen table, for the center piece, I made a card house and scattered heart-shaped, red confetti all over.
The dining room's theme was the Mad Hatter Tea Party.
On the table I placed tea cups, mismatched, with napkins and teapots. There are perfume and nail polish bottles on the table that have "Drink Me!" written on them. To the right of the bottles is a giant pill I found at my university to advertise some drug. It has "Eat me!" written on it. The book is a book on etiquette I had in my library. I put it out there, too.
This is my center piece. It is my giant, homemade hat with a teapot I found from the Goodwill. There is a fishing lure sticking out the spout. A rat I found from the dollar store hides behind the hat.
This is another craft I made out of an old children's book about rabbits. It's supposed to look like it's flying. There'll be a better example later. If you're interested in how to make this, check out the book The Repurposed Library.
When guests enter the house, they enter the forest. Here are the butterflies and mushrooms. I had some dead sticks and garlands scattered about to make it seem more foresty.
Close up of my paper-mache mushrooms. I have a tutorial on how to make these here.
For a terrible surprise during the scavenger hunt, I placed a bunch of mannequins in the basement :3 I got these off a friend's coworker whose best friend died. Phew, hope you caught up with that.
The family room's theme was whimsical and surrealism.
Couldn't resist hahaha
Click pictures to enlarge. This is my moon. I made the clouds by wrapping them in discount fabric I bought at a garage sale. The moon is simply cut from cardboard and painted with acrylics.
This is what it looked like at the party. Best part was, the night of the party, the moon was a waning crescent like the one I made. Totally unplanned. ;)
And that was that! Everyone had a blast and it was a lot of fun to make. Hope I've given everyone some ideas for their own Alice party!
Labels:
Alice in Wonderland,
American Mcgee,
budget,
decorations,
Halloween,
mushroom,
papier-mache,
party,
Party City,
red velvet
Friday, October 21, 2011
Party City Coupon - 25% Off
Here's a Party City coupon I was sent in the mail for 25% all Halloween items! The only limit is that it cannot already be on sale if you use the coupon. Coupon can be used online or in a store.
Print out the coupon here: Party City Coupon
Online coupon code: PCXHR3
Coupon will expire after tomorrow!
Print out the coupon here: Party City Coupon
Online coupon code: PCXHR3
Coupon will expire after tomorrow!
Labels:
coupon,
coupon code,
decorations,
discount,
Halloween,
party,
Party City
Tuesday, September 20, 2011
Alice in Wonderland Halloween Party Crafts
Hi! Just a couple more updates so you can see some of the ideas I have. I have already shown a couple tutorials on some of the items I'm making, and I really hope you guys are enjoying those! They took forever to make, phew! Anyway, here are some items I'm making for my Alice in Wonderland Halloween party.
The neck and skull of my Jabberwocky skeleton. I didn't take a picture of it with the jaw, here.
My man in the moon blowing clouds. I didn't take a picture of the face I painted on it yet, but I have finished it and it looks smashing.
A centerpiece for the Red Queen room. This will go on the table.
Some flower eyeballs. I wanted to get something surreal, playful, and scary all at the same time.
Labels:
Alice in Wonderland,
craft,
decorations,
diary,
Halloween,
party
Saturday, September 17, 2011
Halloween/Alice in Wonderland Party Game - Icebreaker
The ultimate goal of a party for me is to mix groups of people together. If this were chemistry, the goal would be to make the non-polar people mix with the polar people.... not a very good comparison since this practically never happens in chemistry... but whatevs! You get the idea. Anyway, we all know how people sort of coalesce into their own cliques and then those who aren't part of a group are very self-conscious. Self-conscious people do not have fun at parties, so let's eliminate this!
One good way to break apart the group dynamics is to throw everyone out of their element. You can embarrass everyone. Last year I had them eat a doughnut....that was hanging from a rope....and they couldn't use their hands.... Boy, were the pictures great for that game! This year, I'm going to have this game!
The point of the game is to figure out who you are supposed to be. Everyone gets a placard with their person/thing to hang around their neck. The sign rests on their back so that they cannot read it, but everyone else can. In order to figure out what their plaque says, they must talk with other people. Those who can read the person's plaque must speak to the person wearing it as if they were that person. If you've ever watched "Whose Line is It Anyway?" you might be a bit more familiar with the concept of this game. Here's an example though if you need it:
What I like best about this game is this: people don't have to be themselves! When other people interact with them, they are speaking to character. Hopefully this gets rid of some of the awkward tension that may pass when you are being introduced to someone new because you'll feel more comfortable interacting with a familiar character. (Does that make sense? I hope it does.)
Once the person wearing the plaque starts figuring out what they are, they can start talking as if they were that person! When the time's up, everyone gets to make a gander at who they are. If you get it right, they get a prize! And hopefully they also made some friends. Like all icebreakers, this can backfire, but it's up to you as the host to get everyone talking and try to mix the groups up a bit.
What I did to make these placards is cut some cardboard, painted them black, and with a silver Sharpie, wrote out all the names. Then I cut some soft yarn (since these are going around people's necks, I want them to be comfortable) and hot glued them to the backs. That's it! It's a cinch.
Weeeee! This is going to be so much fun! :D More party stuff coming up in a bit!
One good way to break apart the group dynamics is to throw everyone out of their element. You can embarrass everyone. Last year I had them eat a doughnut....that was hanging from a rope....and they couldn't use their hands.... Boy, were the pictures great for that game! This year, I'm going to have this game!
Example
Person #1 [wearing plaque that says "The Headless Horseman"]: Hi!
Person #2: Oh, hey! How's it going! You're head feeling any better? Oh... sorry. Forgot...sore subject *cough cough*
What I like best about this game is this: people don't have to be themselves! When other people interact with them, they are speaking to character. Hopefully this gets rid of some of the awkward tension that may pass when you are being introduced to someone new because you'll feel more comfortable interacting with a familiar character. (Does that make sense? I hope it does.)
Once the person wearing the plaque starts figuring out what they are, they can start talking as if they were that person! When the time's up, everyone gets to make a gander at who they are. If you get it right, they get a prize! And hopefully they also made some friends. Like all icebreakers, this can backfire, but it's up to you as the host to get everyone talking and try to mix the groups up a bit.
What I did to make these placards is cut some cardboard, painted them black, and with a silver Sharpie, wrote out all the names. Then I cut some soft yarn (since these are going around people's necks, I want them to be comfortable) and hot glued them to the backs. That's it! It's a cinch.
Weeeee! This is going to be so much fun! :D More party stuff coming up in a bit!
Labels:
Alice in Wonderland,
craft,
game,
Halloween,
icebreaker,
party
Monday, September 12, 2011
Advice for a Halloween Party on a Budget (Hopefully Under $100)
It's that time of year again, and you decide you want to plan a huge party....but your pockets only have a couple pennies in them. Well, so far, I've been doing fantastic with keeping on budget for my party. I have spent a whopping total of $18 on my party so far and have boxes of decorations already set. So here's some tips I have for party planning.
1) Plan Waaaaay Ahead:
Why plan months in advance? For several reasons. First, because the day of your party tends to sneak up on you, and if you aren't preparing well ahead of time, then you have to rush to finish everything and it's a slapdash mess. Second, because you have time to wait for things to go on sale. This is the key to having a good party. Sure, you can have a great time on a last minute fling, but this will take a lot of stress on you as the party planner.
2) Garage sale:
If you plan enough in advance, you will be able to garage sale during the summer months. Many sales I went to over this summer had Halloween items. I was also able to find items that fit in with my Alice in Wonderland theme thanks to me deciding on the theme ahead of time. Some of the items I bought were candles (shaped in card suits); books (which I reshaped into flying books); fabric; acrylic paints; black, paper lanterns (brand new); flickering lighting effects (also brand new, original price $20, got for $2). That's not mentioning the items I saw but didn't buy like fog machines and other Halloween decorations. You can save so much by buying used items at garage sales, it's worth planning ahead.
3) Secret Shopping
By contract, I can't tell you what company shops for what stores. What I can tell you is that by secret shopping, you can pick up items for a small reimbursement (about $2-5). Though it's small, these add up. Plus, you'll often get a shop fee, separate from the item reimbursement fee. You could end up making money on the deal in the end, which you can put towards something else.
Links to check out: Volition Forums, KSS International, Corporate Research International
These will start you off. KSS International and CRI are mystery shopping companies. They have a variety of stores all over the US. The pay for these is below average, but they are good for beginners. The forums are great for looking for new companies and getting into contact with other shoppers.
4) Make Use of the Free Crafting Sites
There are plenty of books you can find at the library and websites that offer crafts. All of these are free. Sometimes you need to sign up first, and others are just made available to you. Crafting your own items makes things much cheaper, as well as unique to your party.
Here are some of my favorite resources to consult during the planning. Yes, I know these make me sound like a stereotypical, middle-aged housewife. Or my mother. But there are some really great ideas on these sites:
Martha Stewart
Better Homes and Gardens - Don't bother buy the magazine; it's a waste of money. Everything you need and more is on their site. You'll just have to get an account
5) Papier-Mâché
I highly recommend papier-mache when making decorations. Not only is this easy, but highly adaptable. You can even make a pinata if you so wish.
My Recipe:
1/4 cup of flour
1 cup of water (divided)
Elmer's Glue
Salt
Newspaper
1) Start heating up 1/2 cup of water on the stove.
2) In a seperate bowl, measure 1/4 cup of flour.
3) Pour 1/2 cup of cold water into the same bowl.
4) Whisk to remove lumps.
5) Once water on stove is boiling, pour mixture into pot.
6) Stir constantly and stop as soon as mixture begins to bowl.
7) Remove from heat.
8) Add about 1 Tb of salt. (This will help keep the paste last longer before getting moldy.)
9) Allow to cool.
10) Squirt some Elmer's Glue into the mixture. The paste alone should work, but I like to use this as a back up. Just in case.
11) Strip up some old newspapers--some in strips and some in small pieces.
12) You're ready to start pasting! Make sure to store paste in refrigerator when finished. Lasts about one and a half weeks. If you want to make something that is circular, past over an inflated balloon, then pop the balloon when finished.
I will be doing a full tutorial on how to make mushrooms (for my Alice in Wonderland party!) all from trash and this paste recipe.
6) Bargain Shop - Non-Food Items
In order to really stretch your dollars, you need to play it smart. You can hit up the Halloween sales that sometimes come, or, if you've planned well ahead, you can hit some great deals.
Dollar Store - The dollar store is another great place to look for deals. Need trash bags for your party? Get 'em here. Need fake flowers for decorations? Get 'em here. Very rarely is there a time when you should not get something from the dollar store, especially if the item is something solely for this one party. Before you try going to a more expensive store, it's probably a good idea to check here first. If it's not what you're looking for or the quality is crap, then you can go to bigger and better retail stores.
Party City - Definitely give their store and website a try. Many of their decoration items are fairly cheap. Their costumes are a little pricey, so make sure to shop their clearance. There you can find full adult costumes (men and women) for as little as $15-30 and child costumes for $5-15. Worried about the shipping? My advice: bide your time. Party City often releases a free shipping code. You can check back on their site to find this code (usually at the top), or you can join their mailing list for updates (join by filling out the form at the bottom of the page).
Hobby Lobby - this is an expensive store for a bunch of Chinese-made crap if you don't shop right. What you need to do is play it smart and never buy full price! Before you go to the store, make sure to go on their website to check what's currently on sale and see if it's anything you'll need. Next, check and see what coupon they are offering. Fairly often they have a coupon for 40% a full price item, which can take quite a bit off your total. I used my coupon for my costume fabric and saved over $10! Check out their leftover fabric in the sewing department if you need it for a craft. These are often located in bins near the back; the fabric is rolled up and has a white sticker wrapped around the center. Again, check the clearance in the back. Not all Hobby Lobbies have clearances, but if yours does, make sure to do some digging.
Goodwill/Thrift Stores - Around Halloween, Goodwills will put out all their Halloween decorations, and I can almost guarantee you'll find something.
7) Bargain Shop - Food Items
Food is probably going to be the most expensive out of everything you're doing for your party. This is where rule #1 fails because you cannot buy food well in advance and still have it be safe and taste good. Catering saves you time, but can get really expensive and be of unknown quality.
My advice is to just do the best you can with food. Know anyone who works for a restaurant? Ask them for help if they get discounts, or you can ask some guests to bring in small, easy items like desserts, chips, or soda. By spreading out the food costs, it will not only make it easier on you price-wise, it will also be a time saver since that's one last dish you'll have to prepare.
8) Set a Budget and Stick to It
Plan a budget and keep to it. Don't be even tempted to go over. The moment you break your budget, you'll be more tempted in the future you'll be to spend again. Just don't do it! Plan, plan, plan.
I hope that helps a little! A little creativity and time will get you far and will save you money! I'm planning on making a tutorial for papier-mâché crafts, specifically how to make Alice in Wonderland mushrooms. See you in a bit!
1) Plan Waaaaay Ahead:
Why plan months in advance? For several reasons. First, because the day of your party tends to sneak up on you, and if you aren't preparing well ahead of time, then you have to rush to finish everything and it's a slapdash mess. Second, because you have time to wait for things to go on sale. This is the key to having a good party. Sure, you can have a great time on a last minute fling, but this will take a lot of stress on you as the party planner.
2) Garage sale:
If you plan enough in advance, you will be able to garage sale during the summer months. Many sales I went to over this summer had Halloween items. I was also able to find items that fit in with my Alice in Wonderland theme thanks to me deciding on the theme ahead of time. Some of the items I bought were candles (shaped in card suits); books (which I reshaped into flying books); fabric; acrylic paints; black, paper lanterns (brand new); flickering lighting effects (also brand new, original price $20, got for $2). That's not mentioning the items I saw but didn't buy like fog machines and other Halloween decorations. You can save so much by buying used items at garage sales, it's worth planning ahead. 3) Secret Shopping
By contract, I can't tell you what company shops for what stores. What I can tell you is that by secret shopping, you can pick up items for a small reimbursement (about $2-5). Though it's small, these add up. Plus, you'll often get a shop fee, separate from the item reimbursement fee. You could end up making money on the deal in the end, which you can put towards something else.
![]() |
| Source: Metro Site Inspections |
These will start you off. KSS International and CRI are mystery shopping companies. They have a variety of stores all over the US. The pay for these is below average, but they are good for beginners. The forums are great for looking for new companies and getting into contact with other shoppers.
4) Make Use of the Free Crafting Sites
There are plenty of books you can find at the library and websites that offer crafts. All of these are free. Sometimes you need to sign up first, and others are just made available to you. Crafting your own items makes things much cheaper, as well as unique to your party.
Here are some of my favorite resources to consult during the planning. Yes, I know these make me sound like a stereotypical, middle-aged housewife. Or my mother. But there are some really great ideas on these sites:
Martha Stewart
Better Homes and Gardens - Don't bother buy the magazine; it's a waste of money. Everything you need and more is on their site. You'll just have to get an account
5) Papier-Mâché
I highly recommend papier-mache when making decorations. Not only is this easy, but highly adaptable. You can even make a pinata if you so wish.
My Recipe:
1/4 cup of flour
1 cup of water (divided)
Elmer's Glue
Salt
Newspaper
1) Start heating up 1/2 cup of water on the stove.
2) In a seperate bowl, measure 1/4 cup of flour.
3) Pour 1/2 cup of cold water into the same bowl.
4) Whisk to remove lumps.
5) Once water on stove is boiling, pour mixture into pot.
6) Stir constantly and stop as soon as mixture begins to bowl.
7) Remove from heat.
8) Add about 1 Tb of salt. (This will help keep the paste last longer before getting moldy.)
9) Allow to cool.
10) Squirt some Elmer's Glue into the mixture. The paste alone should work, but I like to use this as a back up. Just in case.
11) Strip up some old newspapers--some in strips and some in small pieces.
12) You're ready to start pasting! Make sure to store paste in refrigerator when finished. Lasts about one and a half weeks. If you want to make something that is circular, past over an inflated balloon, then pop the balloon when finished.
I will be doing a full tutorial on how to make mushrooms (for my Alice in Wonderland party!) all from trash and this paste recipe.
6) Bargain Shop - Non-Food Items
In order to really stretch your dollars, you need to play it smart. You can hit up the Halloween sales that sometimes come, or, if you've planned well ahead, you can hit some great deals.
Dollar Store - The dollar store is another great place to look for deals. Need trash bags for your party? Get 'em here. Need fake flowers for decorations? Get 'em here. Very rarely is there a time when you should not get something from the dollar store, especially if the item is something solely for this one party. Before you try going to a more expensive store, it's probably a good idea to check here first. If it's not what you're looking for or the quality is crap, then you can go to bigger and better retail stores.
Party City - Definitely give their store and website a try. Many of their decoration items are fairly cheap. Their costumes are a little pricey, so make sure to shop their clearance. There you can find full adult costumes (men and women) for as little as $15-30 and child costumes for $5-15. Worried about the shipping? My advice: bide your time. Party City often releases a free shipping code. You can check back on their site to find this code (usually at the top), or you can join their mailing list for updates (join by filling out the form at the bottom of the page).
Hobby Lobby - this is an expensive store for a bunch of Chinese-made crap if you don't shop right. What you need to do is play it smart and never buy full price! Before you go to the store, make sure to go on their website to check what's currently on sale and see if it's anything you'll need. Next, check and see what coupon they are offering. Fairly often they have a coupon for 40% a full price item, which can take quite a bit off your total. I used my coupon for my costume fabric and saved over $10! Check out their leftover fabric in the sewing department if you need it for a craft. These are often located in bins near the back; the fabric is rolled up and has a white sticker wrapped around the center. Again, check the clearance in the back. Not all Hobby Lobbies have clearances, but if yours does, make sure to do some digging.
Goodwill/Thrift Stores - Around Halloween, Goodwills will put out all their Halloween decorations, and I can almost guarantee you'll find something.
7) Bargain Shop - Food Items
Food is probably going to be the most expensive out of everything you're doing for your party. This is where rule #1 fails because you cannot buy food well in advance and still have it be safe and taste good. Catering saves you time, but can get really expensive and be of unknown quality.
My advice is to just do the best you can with food. Know anyone who works for a restaurant? Ask them for help if they get discounts, or you can ask some guests to bring in small, easy items like desserts, chips, or soda. By spreading out the food costs, it will not only make it easier on you price-wise, it will also be a time saver since that's one last dish you'll have to prepare.
8) Set a Budget and Stick to It
Plan a budget and keep to it. Don't be even tempted to go over. The moment you break your budget, you'll be more tempted in the future you'll be to spend again. Just don't do it! Plan, plan, plan.
I hope that helps a little! A little creativity and time will get you far and will save you money! I'm planning on making a tutorial for papier-mâché crafts, specifically how to make Alice in Wonderland mushrooms. See you in a bit!
Labels:
Better Homes and Gardens,
budget,
cheap,
garage sale,
Halloween,
papier-mache,
party,
secret shopping
Saturday, September 10, 2011
Alice in Wonderland Party Music - Playlist
You can access the playlist here: Alice in Wonderland Playlist
Highlight Songs:
- Collide - "White Rabbit"
- Yeah Yeah Yeahs - "Heads Will Roll"
- Wynter Gordon - "Alice in Wonderland"
- Natalia Kills - "Wonderland"
- Franz Ferdinand - "Lobster Quadrille"
- Maria Kenellis - "Alice in Wonderland"
- Queen - "I'm Going Slightly Mad"
Some are better than others as you'll soon see. I never thought I would have such a hard time finding songs for Alice in Wonderland! It's only one of the most recognizable pieces of English literature...
Labels:
Alice in Wonderland,
Halloween,
instrumental,
music,
party,
playlist,
soundtrack
Halloween Party Music: A Playlist
Since Halloween is just around the corner, I thought it would be about time to compile a list of Halloween music. Now, I really hate cheap Halloween music. What I want is something you can dance to and have a hoppin' party with, but still be on the spooky side. Basically, what you WON'T find on this list are songs like: "The Monster Mash," Bach's "Toccata and Fugue in D-minor," and "One-Eyed, Purple, People-Eater," and other somewhat childish songs. This list includes some oldies, instrumentals, jazz, pop, industrial, rock, psychobilly, and...well... just a bit of everything. I encourage you to explore some of the artists you find. I left out a lot of equally good songs just for the sake of fitting everything in on this list.
You can access the complete list here on Youtube: Halloween Party Playlist
If you don't feel like going through that playlist, here's what I have. I did my best to divide them up into genres:
Alternative:
Gnarls Barkley - "Necromancer" and "The Boogie Monster"
Creature Feature - "Such Horrible Things" and "Six Foot Deep"
Skillet - "Monster"
Saving Jane - "I'm in Love with a Vampire"
Voltaire - "Zombie Prostitute" and "Brains!"
Squirrel Nut Zippers - "Hell"
Cabaret:
Vermillion Lies - "Circus Apocalypse"
Jill Tracy - "Evil Night Together," "The Fine Art of Poisoning"
Electronic:
Chiasm - "Isolated"
Sohodolls - "My Vampire"
Goth:
Ministry - "Everyday is Halloween"
Switchblade Symphony - "Gutter Glitter," "Clown," and "Witches"
Siouxsie & the Banshees - "Halloween" and "Happy House"
Xandria - "Vampire"
Industrial:
Aesthetic Perfection - "The Ones"
Zombie Girl - "Halloween," "The Darkness," "Blood, Brains, and Rock 'n Roll"
L'Ame Immortelle - "Why Didn't I Die?"
Angelspit - "Infect"
Grendel - "One Eight Zero (Life Cried Remix)"
Instrumental/Soundtrack:
Amber Asylum - "Black Waltz"
Suspiria Soundtrack - Theme
The Sims Makin' Magic - "Once a Cemitery," "Loading Screen," "Foggy Shores," and "Build 7"
Silent Hill 2 - "Fear Locked Away," "Other Breath"
Silent Hill 3 - "Prayer," "Battle for Heaven"
Silent Hill: Shattered Memories - "Always on My Mind"
Pentaphobe - "The Cover of Night"
American McGee's Alice - "Duchess Battle Theme"
Jason Tai - "Dollhouses"
Death in June - "Death is a Drummer"
Jazz:
Matt Gross - "Evil"
Musicals:
Phantom of the Paradise - "Life at Last"
Repo! The Genetic Opera - "Zydrate Anatomy"
Nightmare Before Christmas - "Oogie Boogie's Song"
Rocky Horror Picture Show - "Time Warp"
"Oldies" (in quotes because they really aren't that old):
Talking Heads - "Psycho Killer"
Elvis Presley - "Devil in Disguise"
Stevie Wonder - "Superstition"
Pop:
BoA - "Scream"
Katy Perry - "E.T."
Lady Gaga - "Monster," "Teeth," "Bad Romance (Zona Vigor Industrial Remix)"
Nelly Furtado - "Maneater (Bliix Remix)"
Emii - "Magic" and "Zombie Boyfriend"
Rihanna - "Disturbia"
Shakira - "She Wolf"
Natalia Kills - "Zombie"
Roisin Murphy - "Ramalama"
Psychobilly:
Horrorpops - "Walk Like a Zombie"
The Creepshow - "Zombies Ate Her Brain" and "Halloween"
Zombie Ghost Train - "R.I.P."
Rezurex - "Devil Woman from Outerspace"
Rap:
Zion I & The Grouch - "Frankenstein"
Rock:
Rob Zombie - "Dragula" and "Living Dead Girl"
Godsmack - "Voodoo"
Lacuna Coil - "Spellbound"
Lordi - "Would You Love a Monsterman?"
Slow Songs:
Leah Andreone - "Pretty Freak"
Jill Tracy - "Haunted by the Thought of You"
Synth-Rock:
The Birthday Massacre - "Blue" and "Shallow Grave"
Tango:
Collide - "The Lunatics Have Taken over the Asylum"
Techno:
E Nomine - "Der Exorzist" and "Mitternacht"
Camille Jones - "The Creeps (Fedde Remix)"
Fedde le Grand feat. Mitch Crown - "Scared of Me"
Mysto & Pizzi - "Somebody's Watching Me"
Trance:
Tenth Planet - "Ghosts (Vincent de Moor Remix)"
You can access the complete list here on Youtube: Halloween Party Playlist
If you don't feel like going through that playlist, here's what I have. I did my best to divide them up into genres:
![]() |
| Gnarls Barkley |
Gnarls Barkley - "Necromancer" and "The Boogie Monster"
Creature Feature - "Such Horrible Things" and "Six Foot Deep"
Skillet - "Monster"
Saving Jane - "I'm in Love with a Vampire"
Voltaire - "Zombie Prostitute" and "Brains!"
Squirrel Nut Zippers - "Hell"
Cabaret:
Vermillion Lies - "Circus Apocalypse"
Jill Tracy - "Evil Night Together," "The Fine Art of Poisoning"
Electronic:
Chiasm - "Isolated"
Sohodolls - "My Vampire"
Goth:
Ministry - "Everyday is Halloween"
![]() |
| Siouxsie & the Banshees |
Siouxsie & the Banshees - "Halloween" and "Happy House"
Xandria - "Vampire"
Industrial:
Aesthetic Perfection - "The Ones"
Zombie Girl - "Halloween," "The Darkness," "Blood, Brains, and Rock 'n Roll"
L'Ame Immortelle - "Why Didn't I Die?"
Angelspit - "Infect"
Grendel - "One Eight Zero (Life Cried Remix)"
Instrumental/Soundtrack:
Amber Asylum - "Black Waltz"
Suspiria Soundtrack - Theme
The Sims Makin' Magic - "Once a Cemitery," "Loading Screen," "Foggy Shores," and "Build 7"
Silent Hill 2 - "Fear Locked Away," "Other Breath"
Silent Hill 3 - "Prayer," "Battle for Heaven"
Silent Hill: Shattered Memories - "Always on My Mind"
![]() |
| Zombie Girl |
American McGee's Alice - "Duchess Battle Theme"
Jason Tai - "Dollhouses"
Death in June - "Death is a Drummer"
Jazz:
Matt Gross - "Evil"
Musicals:
Phantom of the Paradise - "Life at Last"
Repo! The Genetic Opera - "Zydrate Anatomy"
Nightmare Before Christmas - "Oogie Boogie's Song"
Rocky Horror Picture Show - "Time Warp"
"Oldies" (in quotes because they really aren't that old):
Talking Heads - "Psycho Killer"
Elvis Presley - "Devil in Disguise"
Stevie Wonder - "Superstition"
Pop:
BoA - "Scream"
Katy Perry - "E.T."
Lady Gaga - "Monster," "Teeth," "Bad Romance (Zona Vigor Industrial Remix)"
Nelly Furtado - "Maneater (Bliix Remix)"
Emii - "Magic" and "Zombie Boyfriend"
Rihanna - "Disturbia"
Shakira - "She Wolf"
Natalia Kills - "Zombie"
![]() |
| Horrorpops |
Psychobilly:
Horrorpops - "Walk Like a Zombie"
The Creepshow - "Zombies Ate Her Brain" and "Halloween"
Zombie Ghost Train - "R.I.P."
Rezurex - "Devil Woman from Outerspace"
Rap:
Zion I & The Grouch - "Frankenstein"
Rock:
Rob Zombie - "Dragula" and "Living Dead Girl"
Godsmack - "Voodoo"
Lacuna Coil - "Spellbound"
Lordi - "Would You Love a Monsterman?"
Slow Songs:
![]() |
| Collide |
Jill Tracy - "Haunted by the Thought of You"
Synth-Rock:
The Birthday Massacre - "Blue" and "Shallow Grave"
Tango:
Collide - "The Lunatics Have Taken over the Asylum"
Techno:
E Nomine - "Der Exorzist" and "Mitternacht"
Camille Jones - "The Creeps (Fedde Remix)"
Fedde le Grand feat. Mitch Crown - "Scared of Me"
Mysto & Pizzi - "Somebody's Watching Me"
Trance:
Tenth Planet - "Ghosts (Vincent de Moor Remix)"
Labels:
Emii,
Halloween,
horror,
Horrorpops,
industrial,
instrumental,
Lady Gaga,
music,
musical,
Natalia Kills,
party,
playlist,
pop,
psychobilly,
rock,
soundtrack,
techno
Friday, September 2, 2011
Wacky Mad Hatter Hat -- Detailed, Step-by-Step Supplement w/Pictures and Alterations
This is a pattern and tutorial from Better Homes and Gardens. You can find the original here and here along with the basic patterns. You may need to create an account before you have access to their website and patterns. (It's free so don't worry.) I found that I didn't like their instructions; they were too confusing. So here is a supplement--key word: supplement--to their instructions. No copyright infringement intended; I just want to help people out with this craft.
Skill level: Moderate
Time estimation: ~1.0 - 1.5 hours
Updated supply list
I found I didn't need certain items or the ways they bound certain pieces didn't hold as well. Here is a better list detailing what's needed:
Updated Instructions with Pictures
I don't want to copyright infringe anything here, so these are my tips and advice on how to make this hat an alternative way. I will also give you instructions on how to alter the patterns so you can change the shape and look of your hat. Please, please, please go and sign up on Better Homes and Gardens to see how they do their project first. This will make it much easier to understand why I'm doing things this way.
1) Making the band pattern--- Make your patterns from the ones the website gives you. They say to blow up the pieces 400%. You can do this on your own, but if you are worried about the curved edges, you can easily print them out as guidelines. How neat your curves are really doesn't matter because you can always go back later and straighten them out in step 9. I drew my band pattern directly onto the cardboard with a marker to save time. You can do this, too, because no one will see the cardboard in the end product.
Altering the band pattern:
3) Altering the crown and brim patterns--- Using a flexible ruler such as a tailor's tape, do your best to measure the crown's curved line (the largest curve). How long it is will be the circumference of your crown pattern. Instead of struggling with the tape and getting sloppy lines to make the circle pattern for your crown piece, just take the number you measured and divide it by π. Take this number and add one inch. This will be the diameter of the crown.
You do not have to have cardboard pieces for these patterns. You can use tissue paper, newspaper (iron newspaper first to avoid ink from spreading to your fabric and to straighten out crinkles. Butlers used a similar technique for their masters back in the day), or regular printing paper....whatever works. I used cardboard and butcher paper.
Do the same thing for the brim's section of the band pattern. Only in addition to the diameter you've calculated, add 2x the width you wish for your brim. For example, your diameter is 8'' and you want your brim to be 4''. You would add an additional 8'' to the 8'' diameter to compensate.
Now you have all your pattern pieces and are set for the rest of the project!
4) Cut out crown and band fabric piece--- Using scissors or a rotary blade, cut out one piece of fabric with your crown pattern piece. Be careful not to cut yourself! Cutting out circular pieces can be tricky, especially with a rotary blade. At the same time, using your band pattern piece, cut out one piece of fabric. Add about 0.5'' around the band pattern to make room for a hem later.
5) Cut out fusible interfacing--- Using the same crown pattern piece, cut out one piece of fusible interfacing.
6) Iron fusible interfacing to fabric piece--- Iron the interfacing to the WRONG side of the fabric. Beginners, place the side of the interfacing with all the bumps closest to the fabric.
.
7) Clip the edges of the circle--- Going about 0.5'' deep, snip around the circle. Clipping will eliminate bulk when we press this on our cone in step 10.
8) Prepare hot glue gun--- Plug in the gun to get it warm.
9) Wrap the band into a cylinder--- Curl the cardboard around. Line up the purple, height lines as best as you can. Take the hot glue gun and run a stream of glue along the edge of one side. Press the other side to the glue. How much you overlap doesn't matter, but try to keep it under one inch on each side.
Now's a good time to take your scissors and correct any areas where the cone isn't level. You can test this by resting both ends on a table--it should be able to stand on its own.
10) Glue cylinder top to crown--- Lay the crown piece bottom-side up/interfacing up. Take your band. Along the side for the crown, run hot glue around the circumference. Quickly press this into the center of the crown piece.
11) Hem the band piece--- Using the hot glue gun again, hem the band piece's fabric. Leave one of the straight sides un-hemmed.
11) Glue band piece to cardboard--- Find the seam of the cardboard. Using the hot glue gun, run some glue along the length. Press the un-hemmed side to the glue. Make sure to press the wrong side against the cardboard, leaving the right side of the fabric on the outside. Also make sure to not turn the fabric upside down. Match crown with crown curves, brim with brim curves.
12) Make the brim--- Grab your pattern for the brim piece. Cut out two fabric pieces and two interfacing pieces. If you are new to interfacing, opt for the fusible again. If you feel you're a decent sewer, stick with the non-fusible to save it for other projects. If you use fusible, remember to iron interfacing to both pieces of fabric before continuing.
13) Cut an "X" into one brim piece--- Cut an "X" into one piece.
13) Sewing time!--- Press the correct sides together. Pin edges. You'll have to leave a small opening for wire later. I like to mark these with double pins so I know when to stop sewing. Sew 0.25'' away from the edge. Flip the piece inside-out. Check to make sure you sewed all edges. Correct if you can see interfacing.
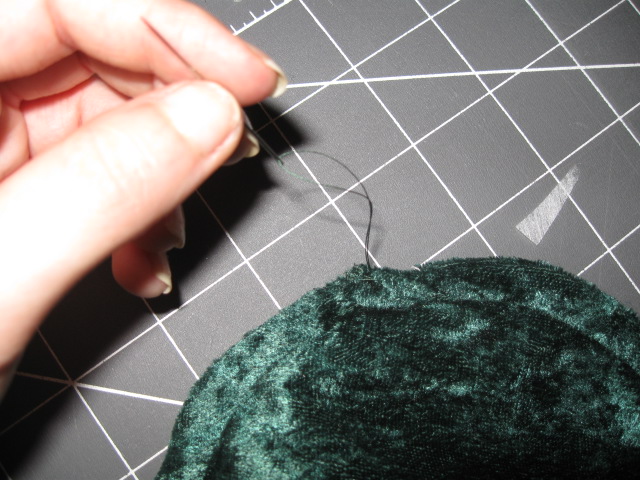
17) Attach brim to rest of hat--- With a longer piece of thread, attach the brim to the rest of the hat using a slipstich. Make sure to pull the fabric on the band taught to avoid wrinkles. I found it was easiest to rest the hat upside-down in my lap as I stitched. Click the pictures below for larger shots.
18) COMPLETE!
19) Add decorations and you're finished!
Skill level: Moderate
Time estimation: ~1.0 - 1.5 hours
Updated supply list
I found I didn't need certain items or the ways they bound certain pieces didn't hold as well. Here is a better list detailing what's needed:
- Old box of lightweight cardboard. Preferably one without a lot of folds. Folds will weaken the board and leave bumps on your hat. A good example would be a large cereal box, but the ideal would be something like a poster board.
- Fusible interfacing Medium-weight would be best probably. I used a light-weight interfacing, though
- Non-fusible interfacing ~Optional~ For more advance sewers and crafters who do not want to spend extra money on the more expensive fusible.
- Fabric about 1/4 yard to 1/2 yard, depending on how large you plan on making your hat. Half a yard will be for quite large hats. Now would be a great time to use up those scrap pieces! I used a piece of stretch, panne velvet fabric. This allowed me to compensate for mistakes while experimenting with patterns and prevented the fabric from fraying on the edges.
- Pins
- Needle and thread Thread should match the fabric.
- Wire or Floral wire Thicker wire should be used if you want to really alter your hat's brim shape. Floral wire will help keep the shape of the brim but will give you only a little bit of molding power.
- Hot glue gun
- Clothes iron
- Sewing machine
- Marker
- Tailor's tape
- Scissors
- Rotary blade ~Optional~
Updated Instructions with Pictures
I don't want to copyright infringe anything here, so these are my tips and advice on how to make this hat an alternative way. I will also give you instructions on how to alter the patterns so you can change the shape and look of your hat. Please, please, please go and sign up on Better Homes and Gardens to see how they do their project first. This will make it much easier to understand why I'm doing things this way.
1) Making the band pattern--- Make your patterns from the ones the website gives you. They say to blow up the pieces 400%. You can do this on your own, but if you are worried about the curved edges, you can easily print them out as guidelines. How neat your curves are really doesn't matter because you can always go back later and straighten them out in step 9. I drew my band pattern directly onto the cardboard with a marker to save time. You can do this, too, because no one will see the cardboard in the end product.
Altering the band pattern:
Let's say you don't like the patterns they gave you. Well, that's a really easy fix.
Here is the basic pattern. I've labeled some areas of the pattern to show what that section will become once completed. The height is colored in purple. The crown/top is the largest curve in this picture, and the curve that will belong to the bottom of the band is the other curve. Whatever you may do to the pattern, the height (in purple) must be the same length! This pattern calls for about 7'', feel free to make it taller if you like.
A rectangle will make a perfect cylinder for your hat. This is good for top hats.
By making almost a semi-circle, you will get a large flair with your hat. This will be very top heavy and very narrow on the bottom. This is good if you're going for a very cartoony look to your hat.
2) Cut out band pattern--- Using your newly created pattern or the pattern supplied on the Better Homes and Gardens website, cut out one band pattern from the lightweight cardboard.
3) Altering the crown and brim patterns--- Using a flexible ruler such as a tailor's tape, do your best to measure the crown's curved line (the largest curve). How long it is will be the circumference of your crown pattern. Instead of struggling with the tape and getting sloppy lines to make the circle pattern for your crown piece, just take the number you measured and divide it by π. Take this number and add one inch. This will be the diameter of the crown.
You do not have to have cardboard pieces for these patterns. You can use tissue paper, newspaper (iron newspaper first to avoid ink from spreading to your fabric and to straighten out crinkles. Butlers used a similar technique for their masters back in the day), or regular printing paper....whatever works. I used cardboard and butcher paper.
Do the same thing for the brim's section of the band pattern. Only in addition to the diameter you've calculated, add 2x the width you wish for your brim. For example, your diameter is 8'' and you want your brim to be 4''. You would add an additional 8'' to the 8'' diameter to compensate.
Now you have all your pattern pieces and are set for the rest of the project!
6) Iron fusible interfacing to fabric piece--- Iron the interfacing to the WRONG side of the fabric. Beginners, place the side of the interfacing with all the bumps closest to the fabric.
.
7) Clip the edges of the circle--- Going about 0.5'' deep, snip around the circle. Clipping will eliminate bulk when we press this on our cone in step 10.
| It helps to use a ruler and marker to mark the notches so you don't go too deep |
9) Wrap the band into a cylinder--- Curl the cardboard around. Line up the purple, height lines as best as you can. Take the hot glue gun and run a stream of glue along the edge of one side. Press the other side to the glue. How much you overlap doesn't matter, but try to keep it under one inch on each side.
Now's a good time to take your scissors and correct any areas where the cone isn't level. You can test this by resting both ends on a table--it should be able to stand on its own.
10) Glue cylinder top to crown--- Lay the crown piece bottom-side up/interfacing up. Take your band. Along the side for the crown, run hot glue around the circumference. Quickly press this into the center of the crown piece.
11) Hem the band piece--- Using the hot glue gun again, hem the band piece's fabric. Leave one of the straight sides un-hemmed.
11) Glue band piece to cardboard--- Find the seam of the cardboard. Using the hot glue gun, run some glue along the length. Press the un-hemmed side to the glue. Make sure to press the wrong side against the cardboard, leaving the right side of the fabric on the outside. Also make sure to not turn the fabric upside down. Match crown with crown curves, brim with brim curves.
| The glue will be hot. Use maker to press fabric to cardboard. |
12) Make the brim--- Grab your pattern for the brim piece. Cut out two fabric pieces and two interfacing pieces. If you are new to interfacing, opt for the fusible again. If you feel you're a decent sewer, stick with the non-fusible to save it for other projects. If you use fusible, remember to iron interfacing to both pieces of fabric before continuing.
13) Cut an "X" into one brim piece--- Cut an "X" into one piece.
13) Sewing time!--- Press the correct sides together. Pin edges. You'll have to leave a small opening for wire later. I like to mark these with double pins so I know when to stop sewing. Sew 0.25'' away from the edge. Flip the piece inside-out. Check to make sure you sewed all edges. Correct if you can see interfacing.
14) Making casing for wire--- Turn the brim right-side out. Sew using a matching thread a casing. Sew about 3/8'' away from the edge. Complete the entire circle.
15) Wire--- Loop the end of the wire as pictured below if possible. This will keep it from catching. Feed it into the casing you just made. Cut off the end once finished. End the wire by twisting it into the beginning of the wire, or loop it again. I am using floral wire because that's all I have at the moment.
16) Slipstich close--- Using a needle and matching thread, slipstick opening closed.17) Attach brim to rest of hat--- With a longer piece of thread, attach the brim to the rest of the hat using a slipstich. Make sure to pull the fabric on the band taught to avoid wrinkles. I found it was easiest to rest the hat upside-down in my lap as I stitched. Click the pictures below for larger shots.
18) COMPLETE!
19) Add decorations and you're finished!
Changes: I made several changes from the original. For starters, I swapped the glues, interfacing, and also altered the pattern slightly. I also changed the order around because when I followed their guidelines, I found some ways they could have been edited to make it simpler. Thanks again! Make sure to check out the original site at Better Homes and Gardens.
Labels:
Alice in Wonderland,
Better Homes and Gardens,
decorations,
fabric,
Halloween,
hat,
how to,
Mad Hatter,
party,
pattern,
sewing,
tutorial
Subscribe to:
Posts (Atom)