Pages

Showing posts with label fabric. Show all posts

Friday, September 2, 2011

Wacky Mad Hatter Hat -- Detailed, Step-by-Step Supplement w/Pictures and Alterations

This is a pattern and tutorial from Better Homes and Gardens. You can find the original here and here along with the basic patterns. You may need to create an account before you have access to their website and patterns. (It's free so don't worry.) I found that I didn't like their instructions; they were too confusing. So here is a supplement--key word: supplement--to their instructions. No copyright infringement intended; I just want to help people out with this craft.

Skill level: Moderate
Time estimation: ~1.0 - 1.5 hours


Updated supply list
I found I didn't need certain items or the ways they bound certain pieces didn't hold as well. Here is a better list detailing what's needed:
  1. Old box of lightweight cardboard. Preferably one without a lot of folds. Folds will weaken the board and leave bumps on your hat. A good example would be a large cereal box, but the ideal would be something like a poster board.
  2. Fusible interfacing Medium-weight would be best probably. I used a light-weight interfacing, though
  3. Non-fusible interfacing ~Optional~ For more advance sewers and crafters who do not want to spend extra money on the more expensive fusible.
  4. Fabric about 1/4 yard to 1/2 yard, depending on how large you plan on making your hat. Half a yard will be for quite large hats. Now would be a great time to use up those scrap pieces! I used a piece of stretch, panne velvet fabric. This allowed me to compensate for mistakes while experimenting with patterns and prevented the fabric from fraying on the edges.
  5. Pins
  6. Needle and thread Thread should match the fabric.
  7. Wire or Floral wire Thicker wire should be used if you want to really alter your hat's brim shape. Floral wire will help keep the shape of the brim but will give you only a little bit of molding power.
  8. Hot glue gun
  9. Clothes iron
  10. Sewing machine
  11. Marker 
  12. Tailor's tape 
  13. Scissors 
  14. Rotary blade ~Optional~


Updated Instructions with Pictures
I don't want to copyright infringe anything here, so these are my tips and advice on how to make this hat an alternative way. I will also give you instructions on how to alter the patterns so you can change the shape and look of your hat. Please, please, please go and sign up on Better Homes and Gardens to see how they do their project first. This will make it much easier to understand why I'm doing things this way.


1) Making the band pattern--- Make your patterns from the ones the website gives you. They say to blow up the pieces 400%. You can do this on your own, but if you are worried about the curved edges, you can easily print them out as guidelines. How neat your curves are really doesn't matter because you can always go back later and straighten them out in step 9. I drew my band pattern directly onto the cardboard with a marker to save time. You can do this, too, because no one will see the cardboard in the end product.

Altering the band pattern:
Let's say you don't like the patterns they gave you. Well, that's a really easy fix. 
Here is the basic pattern. I've labeled some areas of the pattern to show what that section will become once completed. The height is colored in purple. The crown/top is the largest curve in this picture, and the curve that will belong to the bottom of the band is the other curve. Whatever you may do to the pattern, the height (in purple) must be the same length! This pattern calls for about 7'', feel free to make it taller if you like.
A rectangle will make a perfect cylinder for your hat. This is good for top hats.

 By making almost a semi-circle, you will get a large flair with your hat. This will be very top heavy and very narrow on the bottom. This is good if you're going for a very cartoony look to your hat.

2) Cut out band pattern--- Using your newly created pattern or the pattern supplied on the Better Homes and Gardens website, cut out one band pattern from the lightweight cardboard. 

3) Altering the crown and brim patterns--- Using a flexible ruler such as a tailor's tape, do your best to measure the crown's curved line (the largest curve). How long it is will be the circumference of your crown pattern. Instead of struggling with the tape and getting sloppy lines to make the circle pattern for your crown piece, just take the number you measured and divide it by π. Take this number and add one inch. This will be the diameter of the crown.  

You do not have to have cardboard pieces for these patterns. You can use tissue paper, newspaper (iron newspaper first to avoid ink from spreading to your fabric and to straighten out crinkles. Butlers used a similar technique for their masters back in the day), or regular printing paper....whatever works. I used cardboard and butcher paper.

Do the same thing for the brim's section of the band pattern. Only in addition to the diameter you've calculated, add 2x the width you wish for your brim. For example, your diameter is 8'' and you want your brim to be 4''. You would add an additional 8'' to the 8'' diameter to compensate. 

Now you have all your pattern pieces and are set for the rest of the project!

4) Cut out crown and band fabric piece--- Using scissors or a rotary blade, cut out one piece of fabric with your crown pattern piece. Be careful not to cut yourself! Cutting out circular pieces can be tricky, especially with a rotary blade. At the same time, using your band pattern piece, cut out one piece of fabric. Add about 0.5'' around the band pattern to make room for a hem later.
5) Cut out fusible interfacing--- Using the same crown pattern piece, cut out one piece of fusible interfacing.

6) Iron fusible interfacing to fabric piece--- Iron the interfacing to the WRONG side of the fabric. Beginners, place the side of the interfacing with all the bumps closest to the fabric. 
.
7) Clip the edges of the circle--- Going about 0.5'' deep, snip around the circle. Clipping will eliminate bulk when we press this on our cone in step 10.
It helps to use a ruler and marker to mark the notches so you don't go too deep
8) Prepare hot glue gun--- Plug in the gun to get it warm.

9) Wrap the band into a cylinder--- Curl the cardboard around. Line up the purple, height lines as best as you can. Take the hot glue gun and run a stream of glue along the edge of one side. Press the other side to the glue. How much you overlap doesn't matter, but try to keep it under one inch on each side. 

Now's a good time to take your scissors and correct any areas where the cone isn't level. You can test this by resting both ends on a table--it should be able to stand on its own. 


10) Glue cylinder top to crown--- Lay the crown piece bottom-side up/interfacing up. Take your band. Along the side for the crown, run hot glue around the circumference. Quickly press this into the center of the crown piece.
11) Hem the band piece--- Using the hot glue gun again, hem the band piece's fabric. Leave one of the straight sides un-hemmed.
11) Glue band piece to cardboard--- Find the seam of the cardboard. Using the hot glue gun, run some glue along the length. Press the un-hemmed side to the glue. Make sure to press the wrong side against the cardboard, leaving the right side of the fabric on the outside. Also make sure to not turn the fabric upside down. Match crown with crown curves, brim with brim curves.
The glue will be hot. Use maker to press fabric to cardboard.

12) Make the brim--- Grab your pattern for the brim piece. Cut out two fabric pieces and two interfacing pieces. If you are new to interfacing, opt for the fusible again. If you feel you're a decent sewer, stick with the non-fusible to save it for other projects. If you use fusible, remember to iron interfacing to both pieces of fabric before continuing.
13) Cut an "X" into one brim piece--- Cut an "X" into one piece.
13) Sewing time!--- Press the correct sides together. Pin edges. You'll have to leave a small opening for wire later. I like to mark these with double pins so I know when to stop sewing. Sew 0.25'' away from the edge. Flip the piece inside-out. Check to make sure you sewed all edges. Correct if you can see interfacing.
14) Making casing for wire--- Turn the brim right-side out. Sew using a matching thread a casing. Sew about 3/8'' away from the edge. Complete the entire circle.
15) Wire--- Loop the end of the wire as pictured below if possible. This will keep it from catching. Feed it into the casing you just made. Cut off the end once finished. End the wire by twisting it into the beginning of the wire, or loop it again. I am using floral wire because that's all I have at the moment.
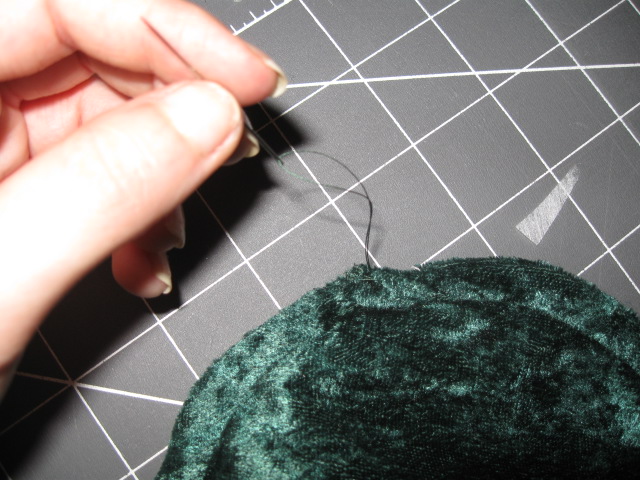
16) Slipstich close--- Using a needle and matching thread, slipstick opening closed.
17) Attach brim to rest of hat--- With a longer piece of thread, attach the brim to the rest of the hat using a slipstich. Make sure to pull the fabric on the band taught to avoid wrinkles. I found it was easiest to rest the hat upside-down in my lap as I stitched. Click the pictures below for larger shots.
 18) COMPLETE! 
19) Add decorations and you're finished!

Changes: I made several changes from the original. For starters, I swapped the glues, interfacing, and also altered the pattern slightly. I also changed the order around because when I followed their guidelines, I found some ways they could have been edited to make it simpler. Thanks again! Make sure to check out the original site at Better Homes and Gardens.


Friday, February 18, 2011

Fabric Arrived! - Updated 3/1/11

My fabric arrived today and I open it up on camera pour vous!
(I accidentally dropped the f-bomb once since I was about to enter a state of strong exasperation. Otherwise I'm completely chaste. I apologize for the curse but I can't figure how to edit it out.) 


Yeah... Distinctive Fabrics... I don't know if I will shop with them again. This is mostly due to the steep cost of shipping for a small amount of fabric. This would be much better if you are ordering bulk.

Now, with the disorganization. I ordered samples awhile ago, and when I finally received them, I received someone else's samples. I understood this since the woman had the same name as me, but then when the second batch came, not all of my samples were available. I didn't get credited for another free sample in return for the one they couldn't give to me.

Now I have the wrong invoice? Huh, bizarre. Anyway, my fabric looks fine, and it's being pre-washed as I speak! I can't wait to finally have a leotard for class.

The shipping is very, very high. Considering that this is just fabric and doesn't need to be insured or surrounded in Styrofoam peanuts, that seems really high to me. This is definitely something you need to consider when factoring out your price. It seems that the lowest, standard shipping price from them is $10.75 for in the United States. The lady on the incorrect invoice I received ordered a lot more fabric but still had the same shipping cost. I received my fabric about a week after ordering, though it may have been a bit longer than that.

Still, perhaps the shipping price is worth it because you are allowed swatches, and not just any swatches, but free swatches. That's not too bad. The shipping for swatches is also free, but it will take awhile to be delivered since it'll be by snail mail.

Unless I can find a cheaper company that offers similar fabric, I'll be sticking with this group for leotard fabric. Perhaps later I will compare and contrast their Lycra blends with some suitable fabrics I can find at brick-and-mortar stores like JoAnn's, Hancock Fabrics, and other popular fabric stores.


Further Updates:
I have completed my first leotard using Distinctive Fabric's fabric, and I must say, it is definitely a quality fabric. I feel confident using it, and it's just as they said it would be in the description. So though some things have been off regarding Distinctive Fabrics, the descriptions seem to be quite on. The total fabric cost per leotard is about $13. Compare that to other leotards online of similar prices and you'll find that they don't have the same quality fabric and aren't made specifically for me. (Other factors would be the cost of the pattern, but even that would only add about five dollars per leotard.) I'm really happy with my fabric despite all the set backs and delays due to errors this company has made with the swatches, but in the end, I have a really nice leotard for class.

Thursday, February 10, 2011

Fabric Swatches!

My swatches for my leotard fabric finally came! YES! There was a huge mix up and I got the wrong swatches, but all's good now! I have the correct ones. For those popping in, I bought my swatches from Distinctive Fabrics since they give five free swatches AND they have the specific fabric I'm looking for for quite cheap! I'm planning on buying both types of Lycra they offer and making leotards out of both of them.

#1 - Cotton Lycra; #2 - Spandex Lycra


Immediate impressions--

Cotton Lycra:
It's softer.
It seems to collect more hair and dust.
Feels like Tshirt fabric
Looks like more air can get through the cloth so it may be more "breathable"

Spandex Lycra:
It's smoother
It feels almost like swimsuit material
Has a slight shine
Stretches more
Tighter weave/less light can get through

As you can see from the picture, the weaving is also different. This gives the fabric a different, distinct feel. The cotton has more lint clinging to it, by the Spandex is smooth so it's difficult for lint to cling to. I'm going to get about a yard of each and experiment with both. I'll post the results up here once I finish. That will probably be some time from now since I've been so busy lately!


In other news, I've had the music from Swan Lake's Prologue stuck in my head ALL day today. I was whistling to myself in the hallways when I realized that if I switched the notes around a bit, it would sound like an Eminem song. ("This Looks Like a Job for Me," yeah, we're going back in time a bit there.)

Saturday, January 22, 2011

Lycra find!

 I've been working busily today to complete my leotard prototype. And I must say, it looks rather good! There's no way I can wear this leotard to class since it doesn't have the full stretch both ways, but the pattern definitely works. It's easy once you figure out the directions. Now, I feel I'm ready to tackle to big task of sewing a leotard for class! I need to find a decent fabric. Since the fabric stores with brick and mortar branches have little variety, I decided to look around online again. I needed something that will give me a swatch AND had, preferably, a cotton/Lycra mix. Boy did I get lucky!

I found an amazing deal for a cotton-lycra blend!


The cotton has everything the pattern requires: a two way stretch, 60" wide, comes in black, 85% cotton 15% Lycra, and only $7.50/yard. Plus, I can get a swatch!

Signing up for this company's registry will give you five free swatches. Needless to say, I took advantage of this offer. I ordered the cotton Lycra blend, plus another Lycra blend they offered, Lycra spandex. This will probably be too stretchy, but hey, it's worth a shot. Shipping is free, too. So check this site out!

Sweet!! I can't wait for it to come!

Friday, January 21, 2011

Leotard test run and skirt finished!

I've been working for a couple hours now on this leotard and skirt combo, using the new pattern. So far, so good! I ran into some issues around the skirt but I fixed most of them and it looks pretty good! Passable enough for me! The leotard is also pretty easy so far. It may be a little tight because it only has 70% stretch one way, but since I put that as the width of the pattern, it should be good enough to gauge if it'll fit me or not.
Even though I lowered the top of the leg, it still cuts very high. It'll easily be above my hip bone. I don't really feel comfortable with that, but luckily the skirt covers it.
 The skirt's looking good! It looks lopsided, but I can't figure out why it looks like that.... The more I look at it, though, the more I like how asymmetrical it is.

Anyway, that's it for my sewing today! Have a great weekend! Happy Friday everyone!

Thursday, January 20, 2011

My ballet skirt's progress

I've started working on my skirt first. A little backwards, I know, but it has the easier directions so I want to give it a whirl first. Plus, I'm way too exhausted to put a lot of effort into my trial run, so I'm going the easy way.
The waist is sloppy since I had to pin the short ends of the belt to the dressform.
Right away, I'm running into some trouble. I can't seem to anchor down the chiffon so when I cut it, it tends to sway. This isn't too much of a problem. I did a good job on the main skirt, which is all I'm worried about, but for the belt it's a slightly different story. Still, it's not too big of a deal. BUT, I made a huge mistake. The problem with the fabric is that it's transparent, so when it looks like I have the wrong side up, it's actually the right side. I've already messed up a seam. I either tear it and another seam out and risk ruining the fabric, or I leave it and try to cover it up in a unique way. I don't know what I should do... I'm going to practice ripping out seams on a discarded scrap of the same fabric before attempting the skirt.
I'm positive I cut them the right length. I even double checked.
Also, an even bigger problem is that somehow the belt straps are too short. I'm pretty sure I followed the pattern correctly, but there's still not enough to wrap around the skirt. Luckily, I have a plan for this. I'm going to cut out another, longer strip and just add it to the ends. Once I tube the skirt, it shouldn't matter much. Besides, when its tied, it'll be hard to notice, I think.

I plan on working on this leotard over the weekend. I already have my trial pattern cut out!
It's really easy. There are only a couple of pieces: the front leotard, the back, crotch guard, bra, and sleeves.

Wednesday, January 19, 2011

The pattern's here!

The pattern made it here! I'm so excited! I'm going to start working on it right away!

Here's a picture of it:


The pattern is bigger than most. It comes in two large sheets of paper. I'm going to be tracing over them so I don't have to cut it out. So far, it's really easy to make adjustments. They have right on the pattern where the waistline is so you can adjust as needed. Though depending on your size, there's not too much room you need to make adjustments. The differences between the sizes is small.

I'm a little worried about the instructions. I'm not used to them and the way they have everything labeled throws me off. I'll have to keep looking over them and I'll definitely try a trial leotard before trying on the more expensive spandex.

I'm already starting to make a pattern for a leotard! Today I went to the fabric store and asked the associates what they would recommend. They pointed me straight to spandex and, get this, even recommend bathing suit spandex for leotards. This is particularly good for the "crotch guard" as this pattern likes to call it. I bought a sample of it and will compare it to a couple others to tell you how I think. It's shiny (good or bad depending on the individual) and has the 70% stretch both ways that's needed. 

Pictures later once I cut out my trial! Meanwhile, class tomorrow and college tomorrow... I'm going to be a tired girl!

Monday, January 17, 2011

Ballet Sewing Pattern - Fabrics

My pattern has yet to arrive. It's been over a week and I'm starting to get a tad antsy. To prepare for its arrival, I have already started looking for some fabric so that I can get started right away and have a leotard for class as soon as possible.

I'm probably going to buy from JoAnn's, since it's the only fabric store nearby that carries the type of fabric this pattern will need, but it doesn't stop me from browsing the market a little bit.


Looking for:
        • Black
      • Spandex mix
      • At most $10/yard


We are looking for a fabric with at least two-way stretch. Preferably something with spandex. The pattern recommends Lycra, but any spandex mix will do. It seems cotton/spandex mixes are the most popular for leotards, but I've also seen nylon/spandex. I'll only need one yard for the leotard, and I will probably make a practice leotard out of some black polyester/cotton knit I have to make sure I don't waste any of the spandex because as I found out, spandex can be quite expensive.

The pattern also calls for 59'' wide fabric, which we must take into consideration. If we don't listen to this, then we could end up with not enough fabric. Taking the pattern's requirements into consideration, I found these fabrics:


72% Polyester, 24% Rayon, 4% Spandex; $9.99/yard at Hancock Fabrics
95% Rayon, 5% Spandex; $12.99/yard at JoAnn's
86% Polyester, 14% Spandex; $12.99/yard at Hancock Fabrics
95% Cotton, 5% Spandex; $12.95/yard ON SALE! for $6.95/yard at TrimFabric.com
50% Polyester, 45% Cotton, 5% Spandex; $18/yard ON SALE! for $10/yard at TrimFabric.com

These you would have to buy more fabric of since they aren't quite wide enough:
97% Cotton, 3% Spandex; $8.99/yard at Hancock Fabrics

For the skirt with this pattern, I probably will prefer a chiffon. I have some gorgeous purple chiffon left over from a high school toga costume. I've been dying to use it and plan on using for this pattern. If you don't have chiffon, and want to wait for it to be on sale, then don't worry. Chiffon goes on sale often, I find. You'll only need a yard of it so it'll be very cheap for a ballet skirt. The hardest bit will be sewing it since it's transparent and unravels. I'd recommend overlocking/serging the edges or using a narrow zigzag stitch. I'm going to try zigzag first. If it works, I'll let you guys know! You could also do a narrow hem, but since it's a curved edge it looks like, I'm probably not going to even attempt it.
 I also have this really pretty sparkly fabric my aunt gave me. I was planning on making a cover-up out of it, but I like the idea of a ballet skirt better.
Related Posts Plugin for WordPress, Blogger...