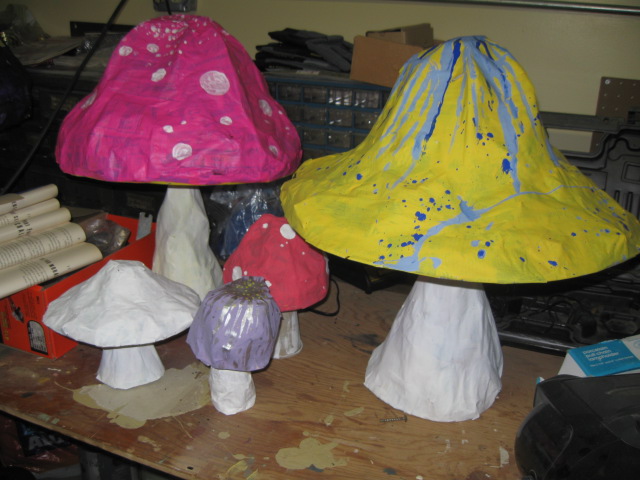
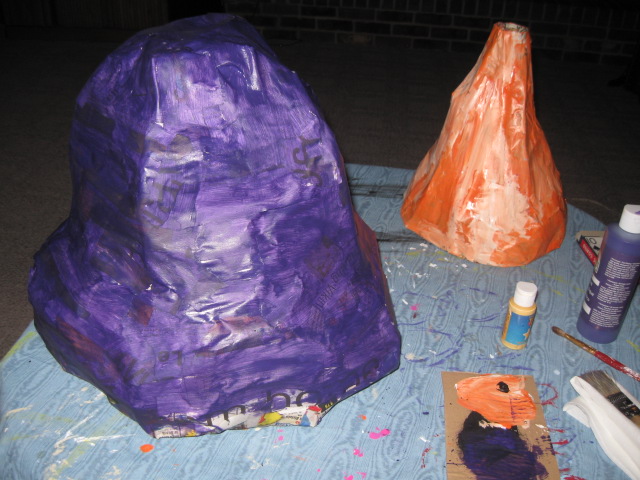
This is a tutorial on how to papier-mâché, or paper mache depending on how you like to pronounce it. Papier-mâché is a French word for "chewed paper." I guess that's because if you've ever made a spitball, you're essentially using the same techniques. (No, I've never actually made a spitball before, hahaha!). You can make some pretty interesting stuff by using this very simple technique. What I'm going to show you how to make today is a simple craft using pure trash and recyclables.
Materials:
Paste (instructions on how to make this below)
Newspaper
Cardboard paper towel roll
Heavy-duty Cardboard
Glue gun
Paint
Instructions:
Glue--
1/4 cup of flour
1 cup of water (divided)
Elmer's Glue
Salt
-
Start heating up 1/2 cup of water on the stove.
-
In a seperate bowl, measure 1/4 cup of flour.
-
Pour 1/2 cup of cold water into the same bowl.
-
Whisk to remove lumps.
-
Once water on stove is boiling, pour mixture into pot.
-
Stir constantly and stop as soon as mixture begins to bowl.
-
Remove from heat.
-
Add about 1 Tb of salt. (This will help keep the paste last longer before getting moldy.)
-
Allow to cool.
-
Squirt some Elmer's Glue into the mixture. The paste alone should work, but I like to use this as a back up. Just in case.
-
Strip up some old newspapers--some in strips and some in small pieces.
-
You're ready to start pasting! Make sure to store paste in refrigerator when finished. Lasts about two weeks.
Mushroom--
1) Cut out a medium circle from cardboard. This will be the base of the mushroom. It should be fairly wide depending on how big you want the cap to be.
2) Take a paper towel roll, and with a glue gun, glue one end in the center of the cardboard base. Unplug the glue gun. You'll still need it, but the next steps takes some time to finish.
3) Crumble up some newspaper and place it along the cardboard tube. You may want to use tape to help mold the base into the shape you want.
4) Start ripping your newspaper into long strips.
5) Dip your strips into paste. Get the excess glue off by running the newspaper between two fingers. The paper should not be gloppy, but still wet enough to work with.
6) Apply the newspaper as you see in this picture. We are forming the stem as we do so.
7) Keep applying newspaper until the stem is complete. Set aside to let dry.
8) Cut out a larger circle from the cardboard.
9) Once stem is dry, measure the diameter of the top. This may or may not be different than the diameter of the paper towel roll depending on how you used your strips of newspaper.
10) Cut out a hole with the same diameter in the center of your cardboard circle.
11) Check and make sure hole is wide enough to fit on the stem.
12) This part is the most important for the best shape. You'll need to build a rough skeleton in order to get the best results. The more "ribs" you use, the better, stronger, and solid the shape will be. From cardboard, cut out one piece that matches the shape you want.
13) Hold it up to the mushroom to see how you like its shape. The bottom of the "rib" piece should line up with the edge of the mushroom piece or go just a bit past it. If it's under, remake the rib. I like to use eight ribs and find that this has the best results.
14) Once you get a shape you like, cut out seven more. You can use the first as a pattern piece. I recommend giving one piece a "lip" on top (see picture in step #12). This prevents the newspaper from sinking into the hole made by the cardboard tube during later steps. This is one of the first times I'm trying to make a large mushroom with less than eight ribs and it came out okay, but not as good as the others.
15) Using a glue gun, glue these rib pieces to the crown piece. Try to space them out evenly. The reason why you need heavy-duty cardboard here is because if you use lightweight, it will not hold its shape as well.
16) Like the stem before, crumple of paper in the shape you wish the mushroom to be. This is so the newspaper won't collapse and fall out of the desired shape, even with the ribs. The more ribs you have, the easier this step will be.
17) Apply paste/newspaper over crumpled newspaper. Go section by section.
18) Keep molding your mushroom as you work around the sections.
19) Once finished, let dry. Do not complete the top or bottom portions yet as your mushroom will still be quite soggy.
20) Once dry, apply newspaper along tops and bottoms. If you fear the newspaper will sink, apply more crumpled up newspaper and paste over that. Also at this time, fix up any places where the surface isn't smooth. It will be hard to get a perfect surface using this method, but it's faster and quicker this way. Not to mention cheaper.
21) Again, let dry before painting.
22) Paint! Weeee! Have some fun and do some wacky colors!
23) And you're done!
You now have a light-weight craft made entirely of trash and some glue and paint. Welcome to Wonderland!!